Building a Lily58 Pro split keyboard
I recently got into mechanical keyboards. I tried the Keychron K series first, then landed up on a Lily58 Pro.
I got introduced to mechanical keyboard D.I.Y (Thanks to Barkek).
I've owend one mechanical keyboard before this, the Keychron K6, loved it. Had a 65% layout, aluminium case and bluetooth etc.
Like a good nerd I did my research... watching every YouTuber (nearly) I could find on the subject.
Lily58 build
This is an account of my experience building the board. Here is the official build guide
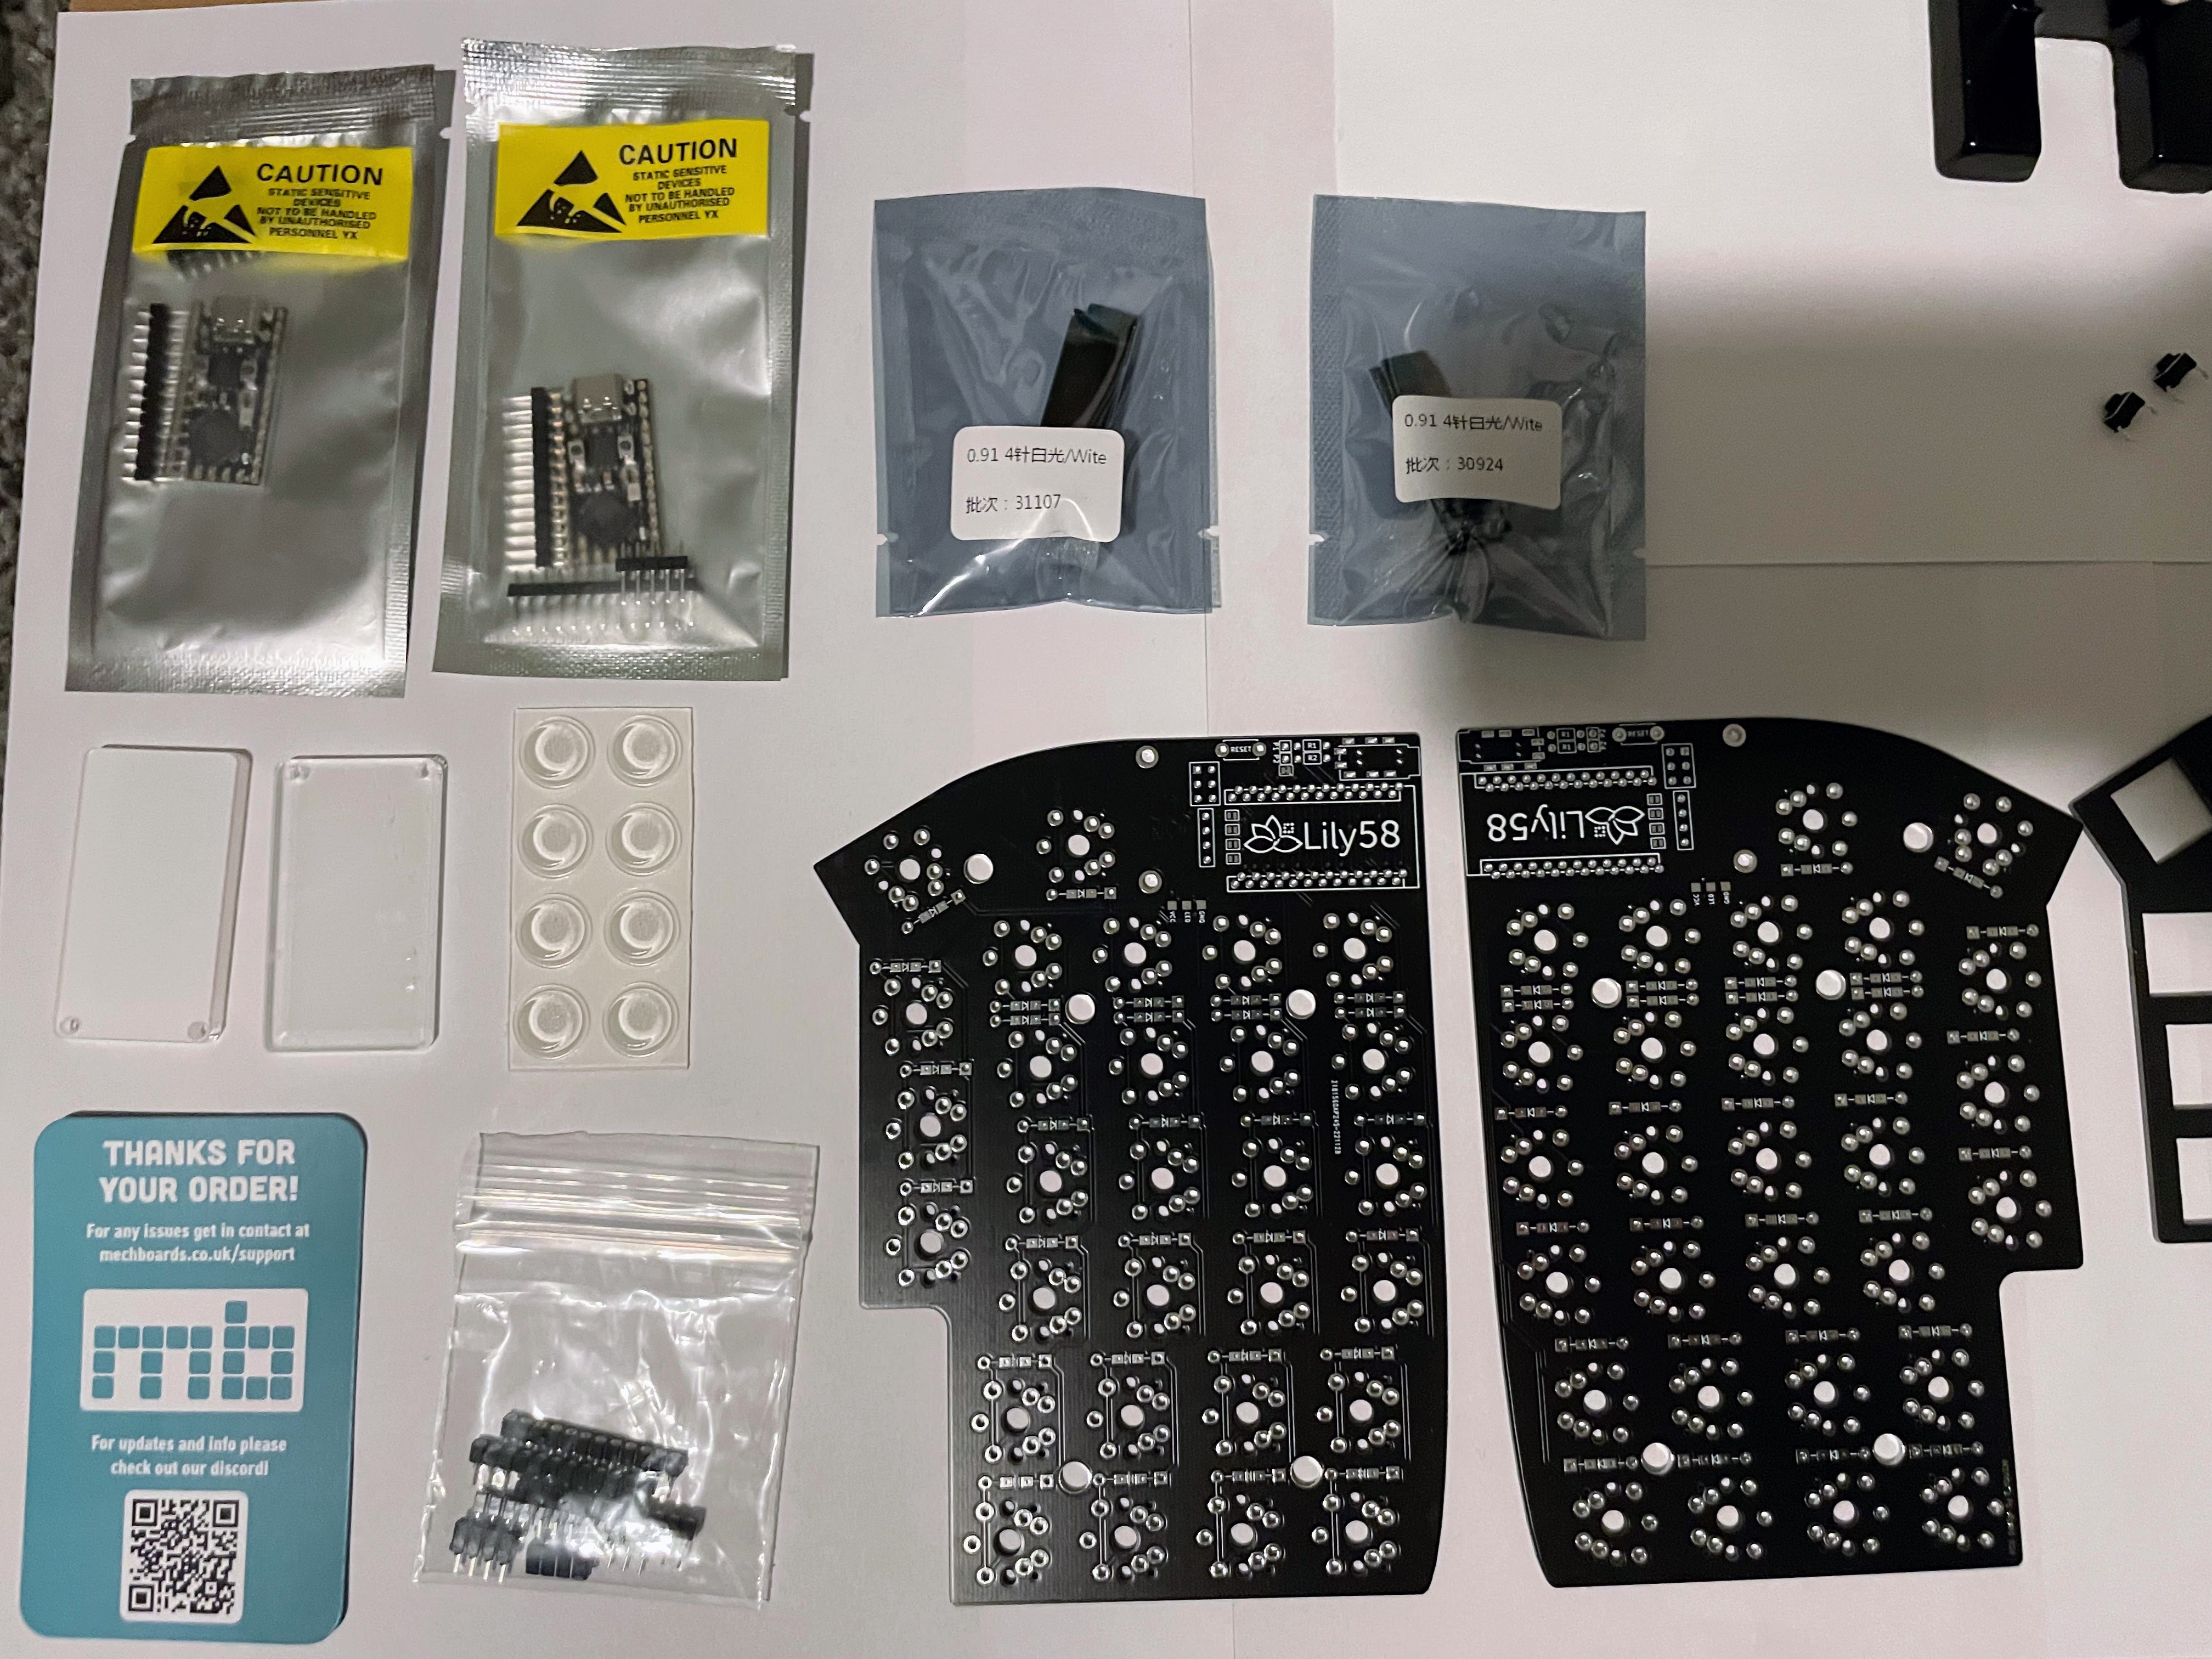
Enter the Lily58 Pro split keyboard hobby pack.
It was a serious undertaking, a true test of patience, do not attempt to build this thing without having the right tools. Or bad things will happen, trust me on this.
If by mistake you solder something in the wrong place, you will need some soldering wick and some flux to remove the part/s, or risk damaging the PCB board while applying beginners (un)luck attempts at fixing things.
What you need

- Soldering iron, get one with thin tip for this kind of PCB board.
- Crocodile hands with magnifier (nice to have, helpful when connecting the micro-controller)
- Soldering matt (nice to have)
- Lead free solder at size of 0.5mm was good for the detailed works
- Weller tip activator, to clean your soldering iron tip
- Soldering tip cleaner
- Weller Flux, to help desolder parts off the PCB board
- Desoldering wick/wire, works with the flux to smoothly and safely remove parts of the PCB board
Seems like a lot, but they all had their part to playin the build.
The build 🚧
Took some pictures to give you sense of how it might go. Absolute first timer with soldering... here we go.


The first attempt did not go so well
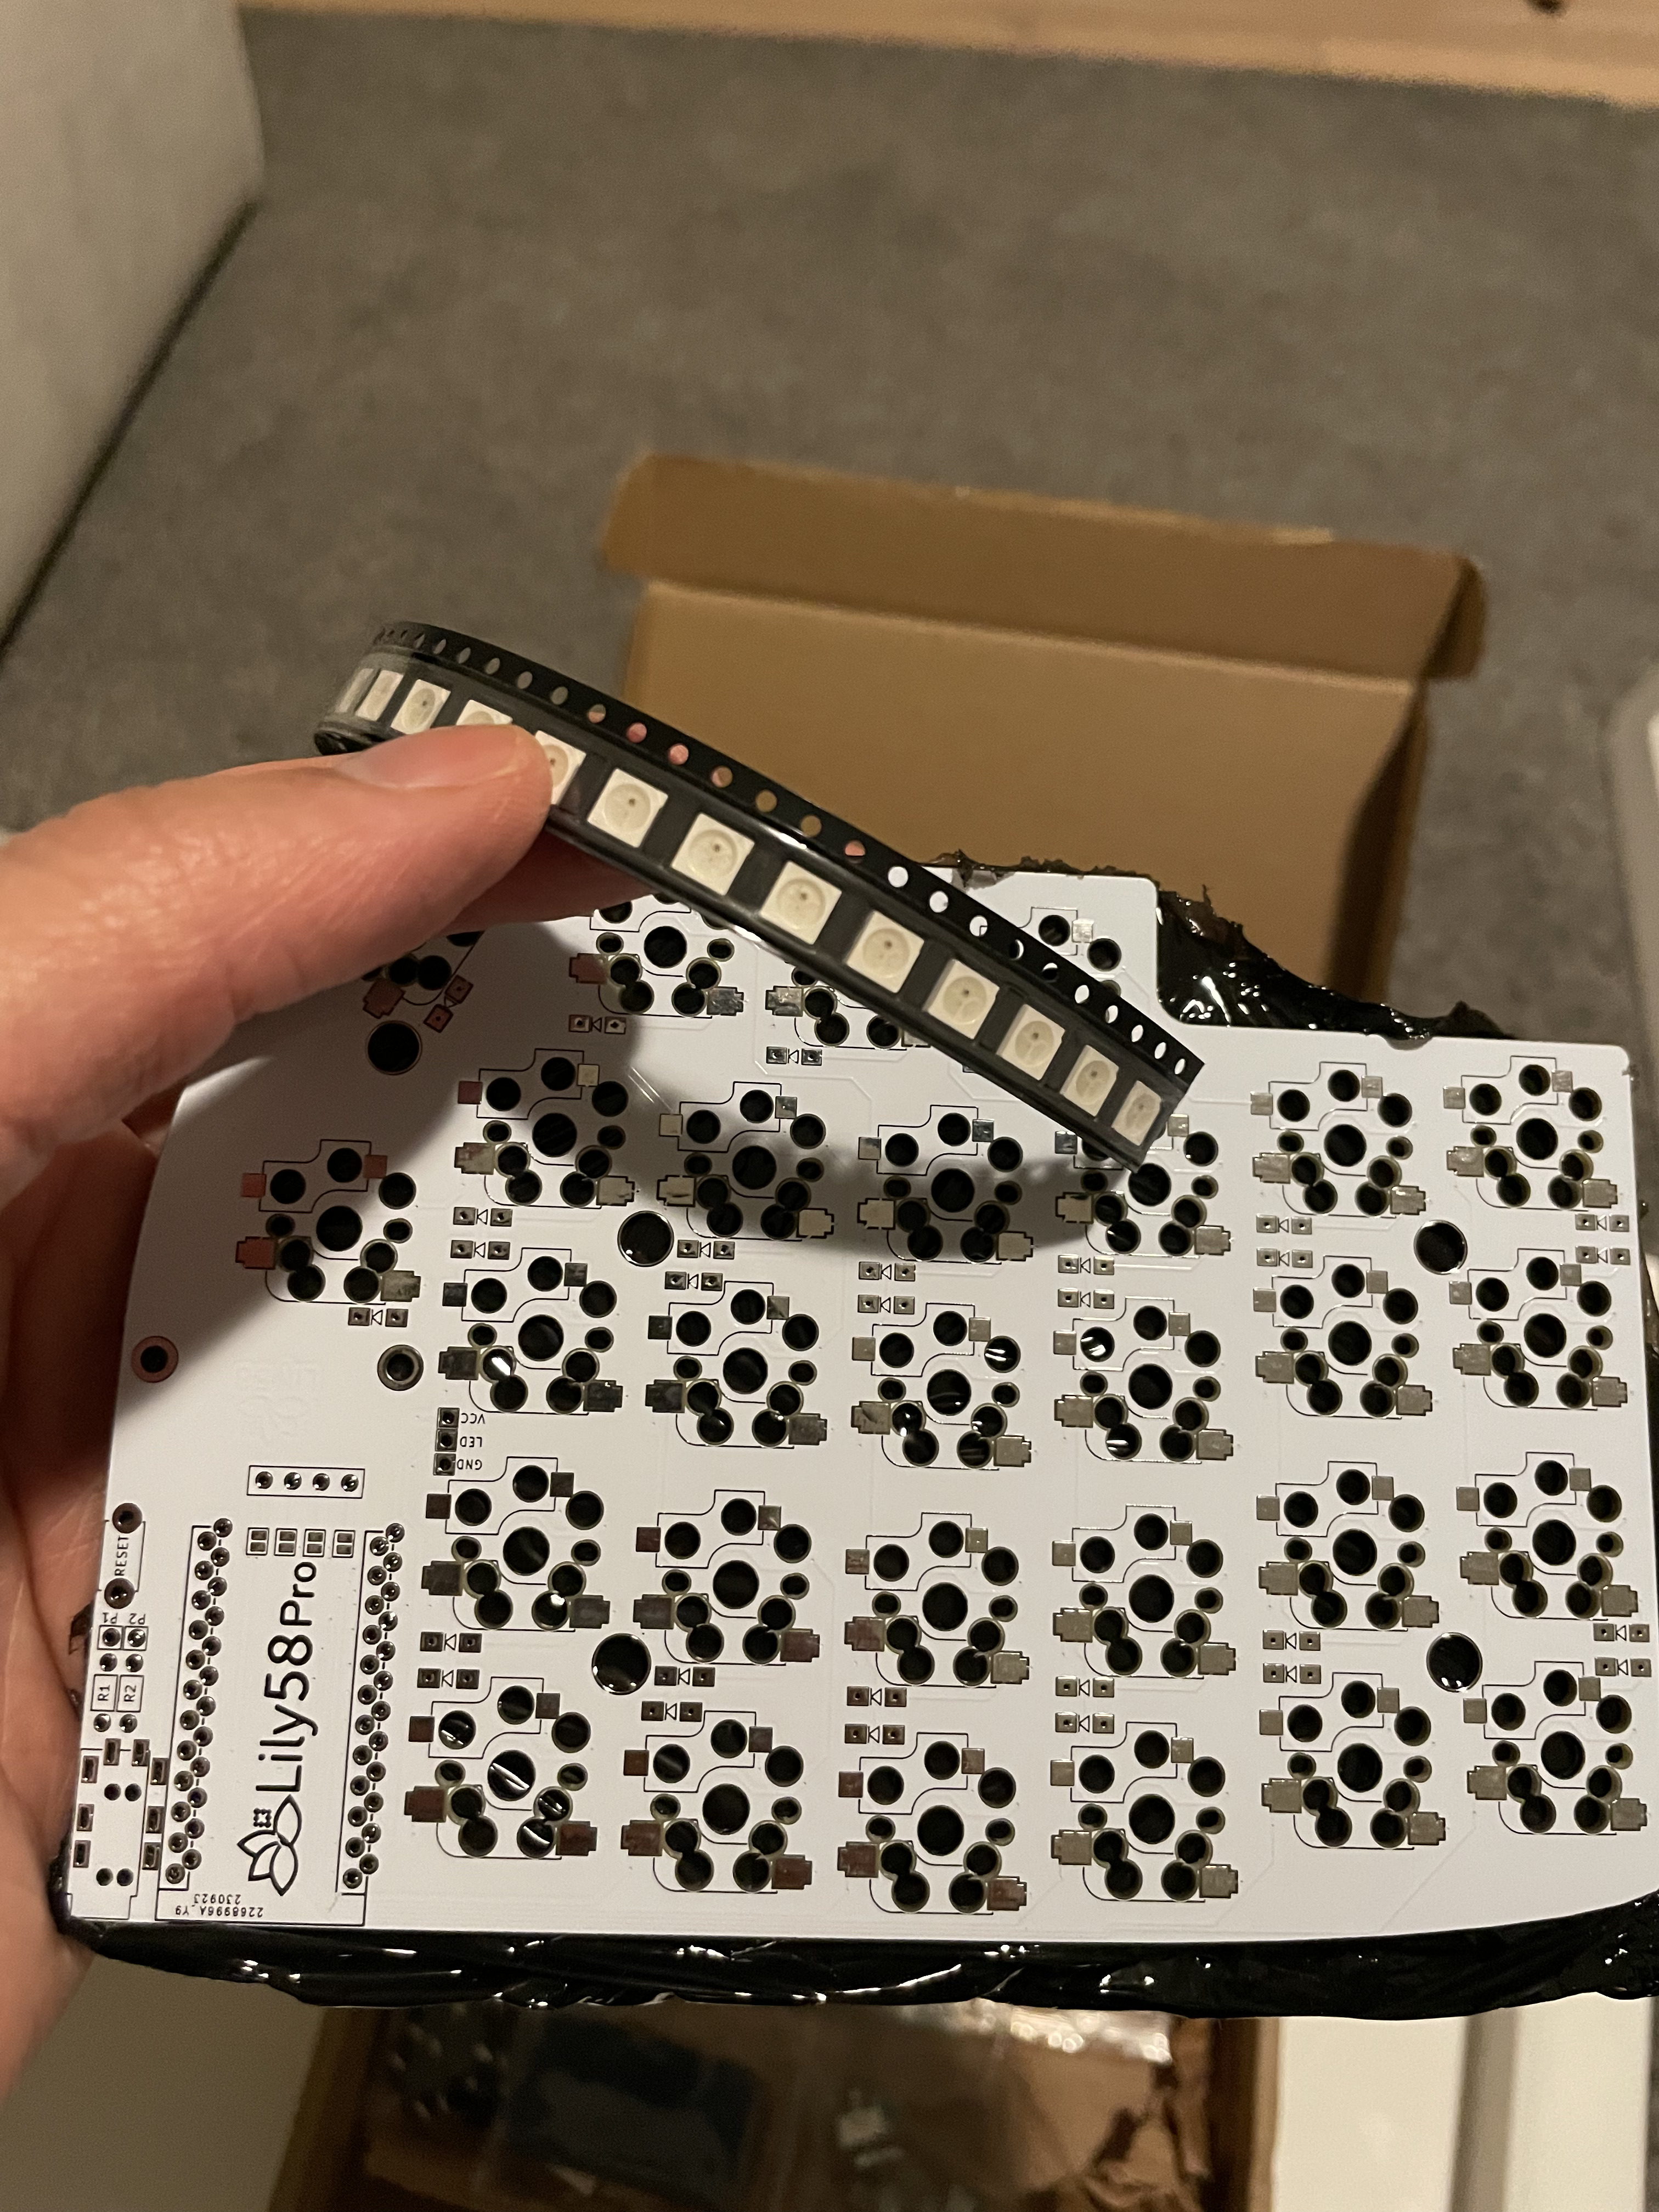
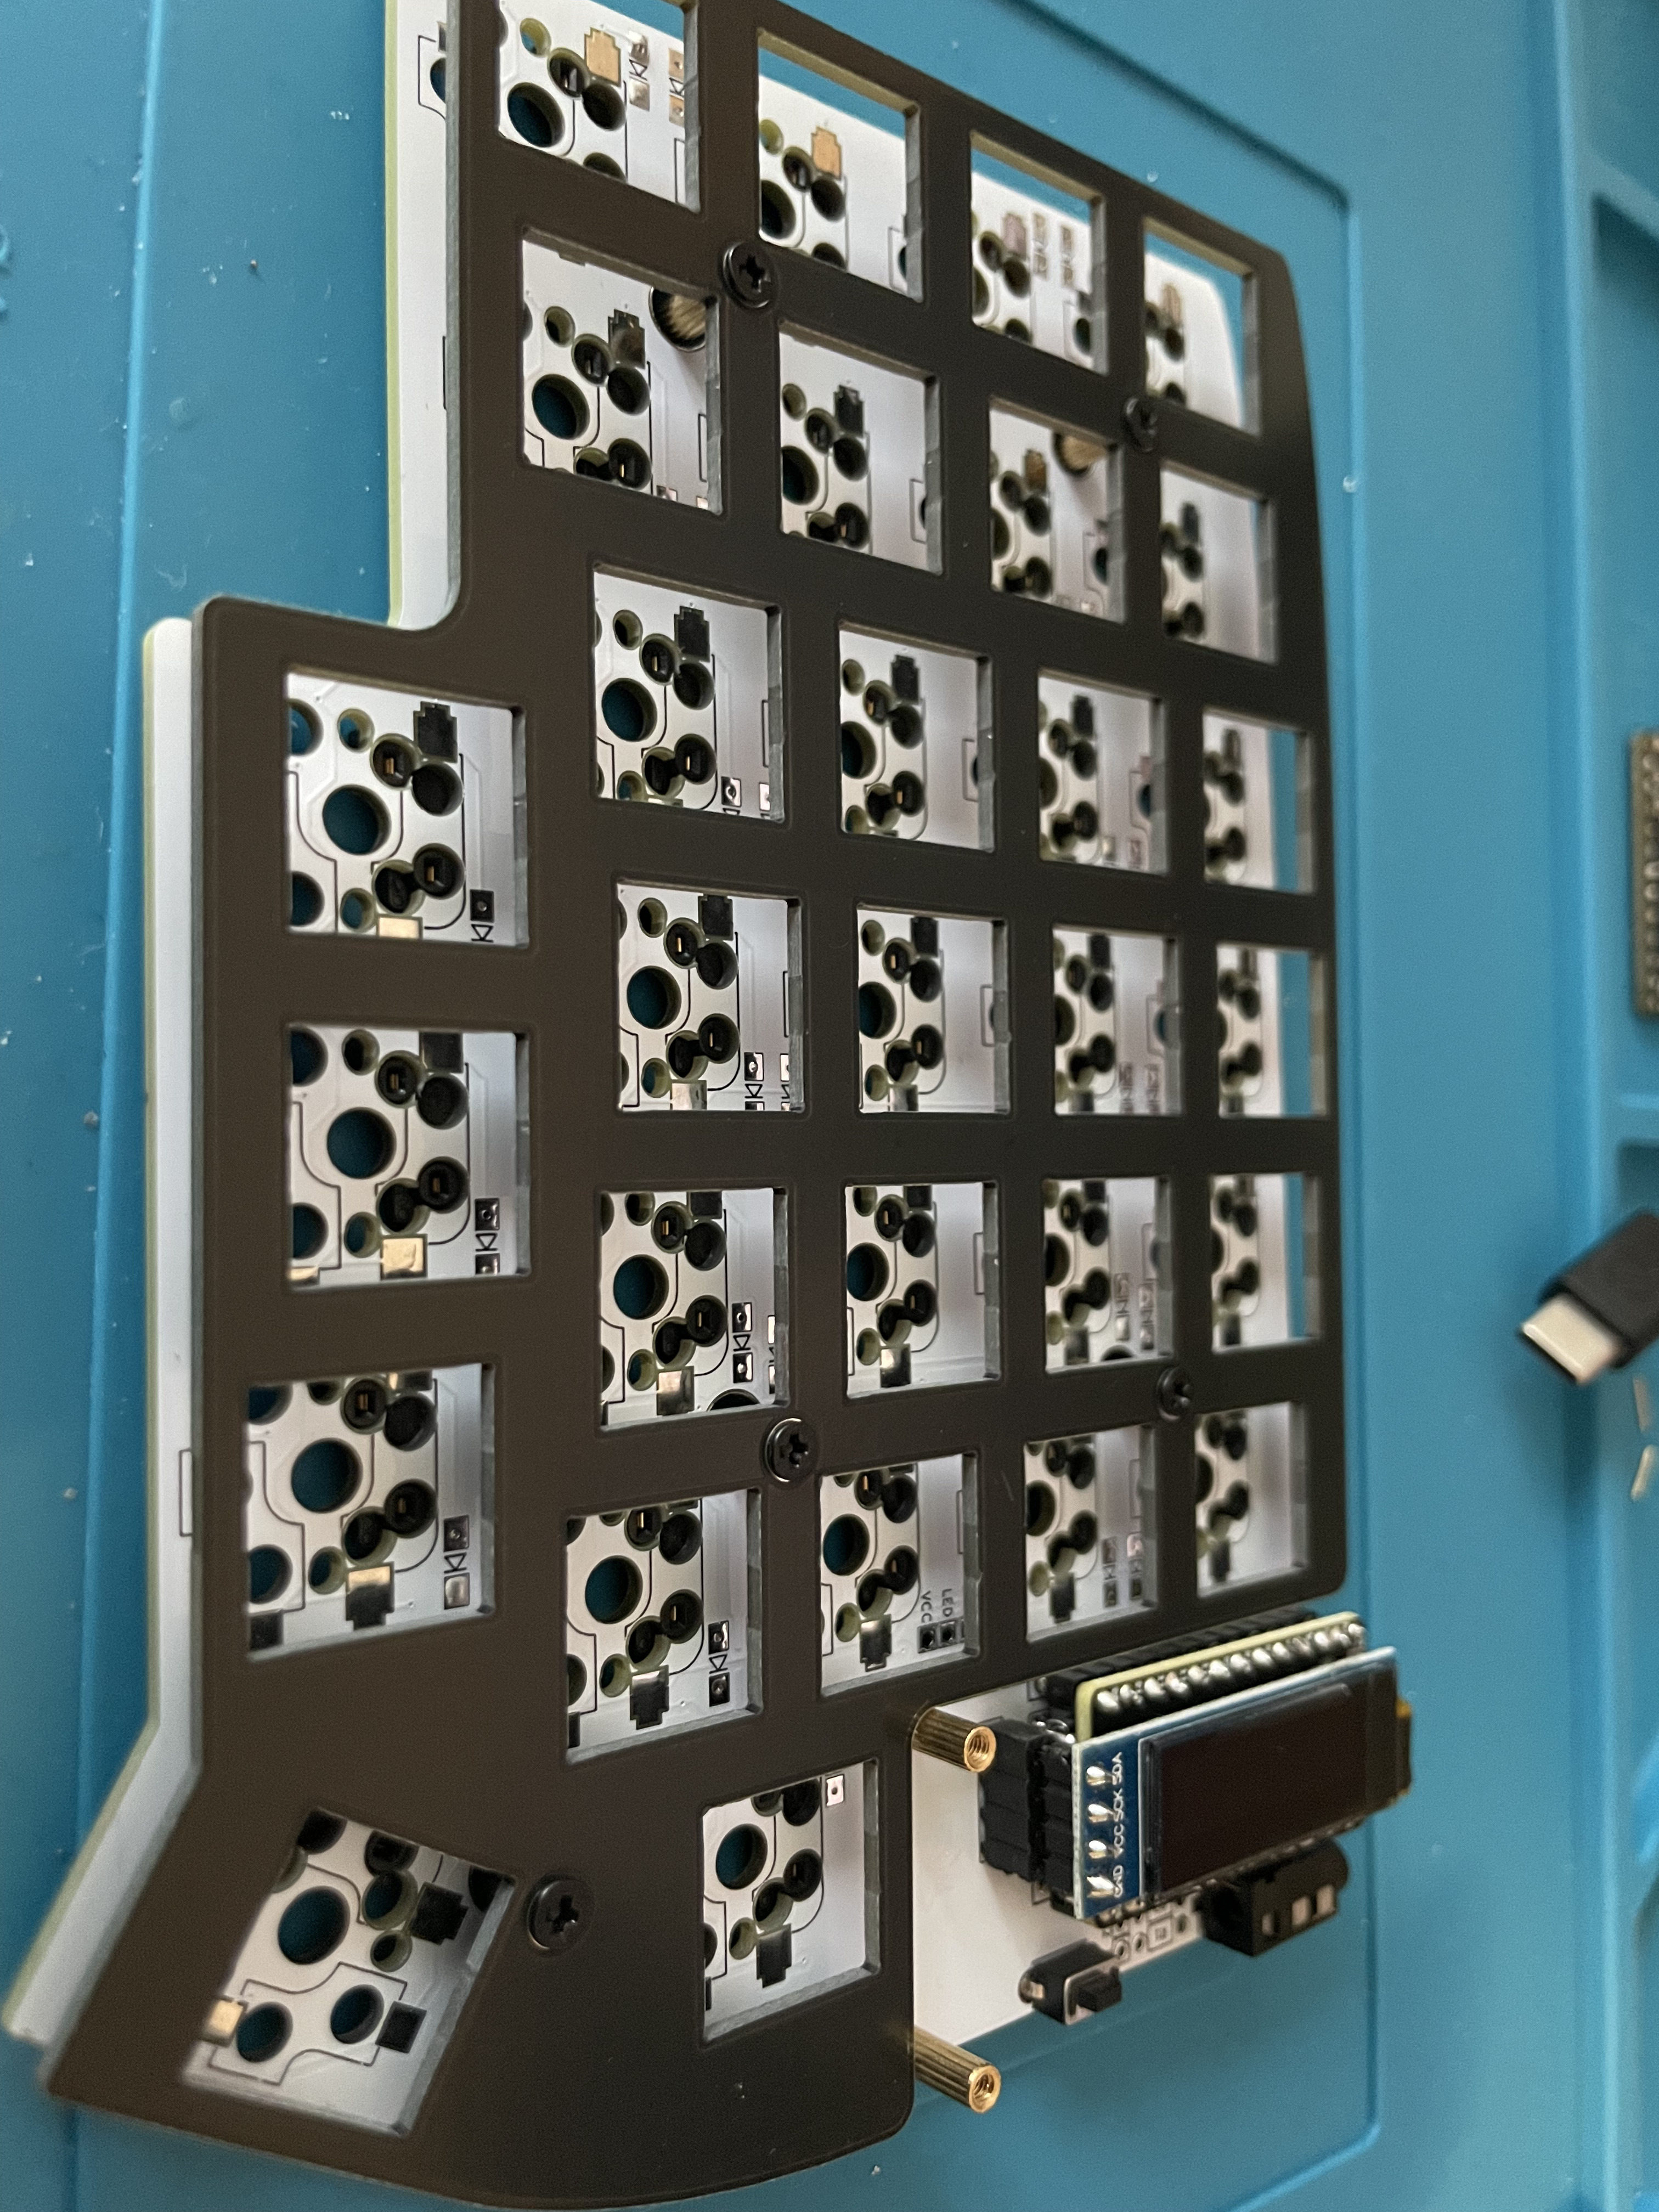
Initialy I got got the standard Lily58, black PCB board, no bluetooth capabilities.

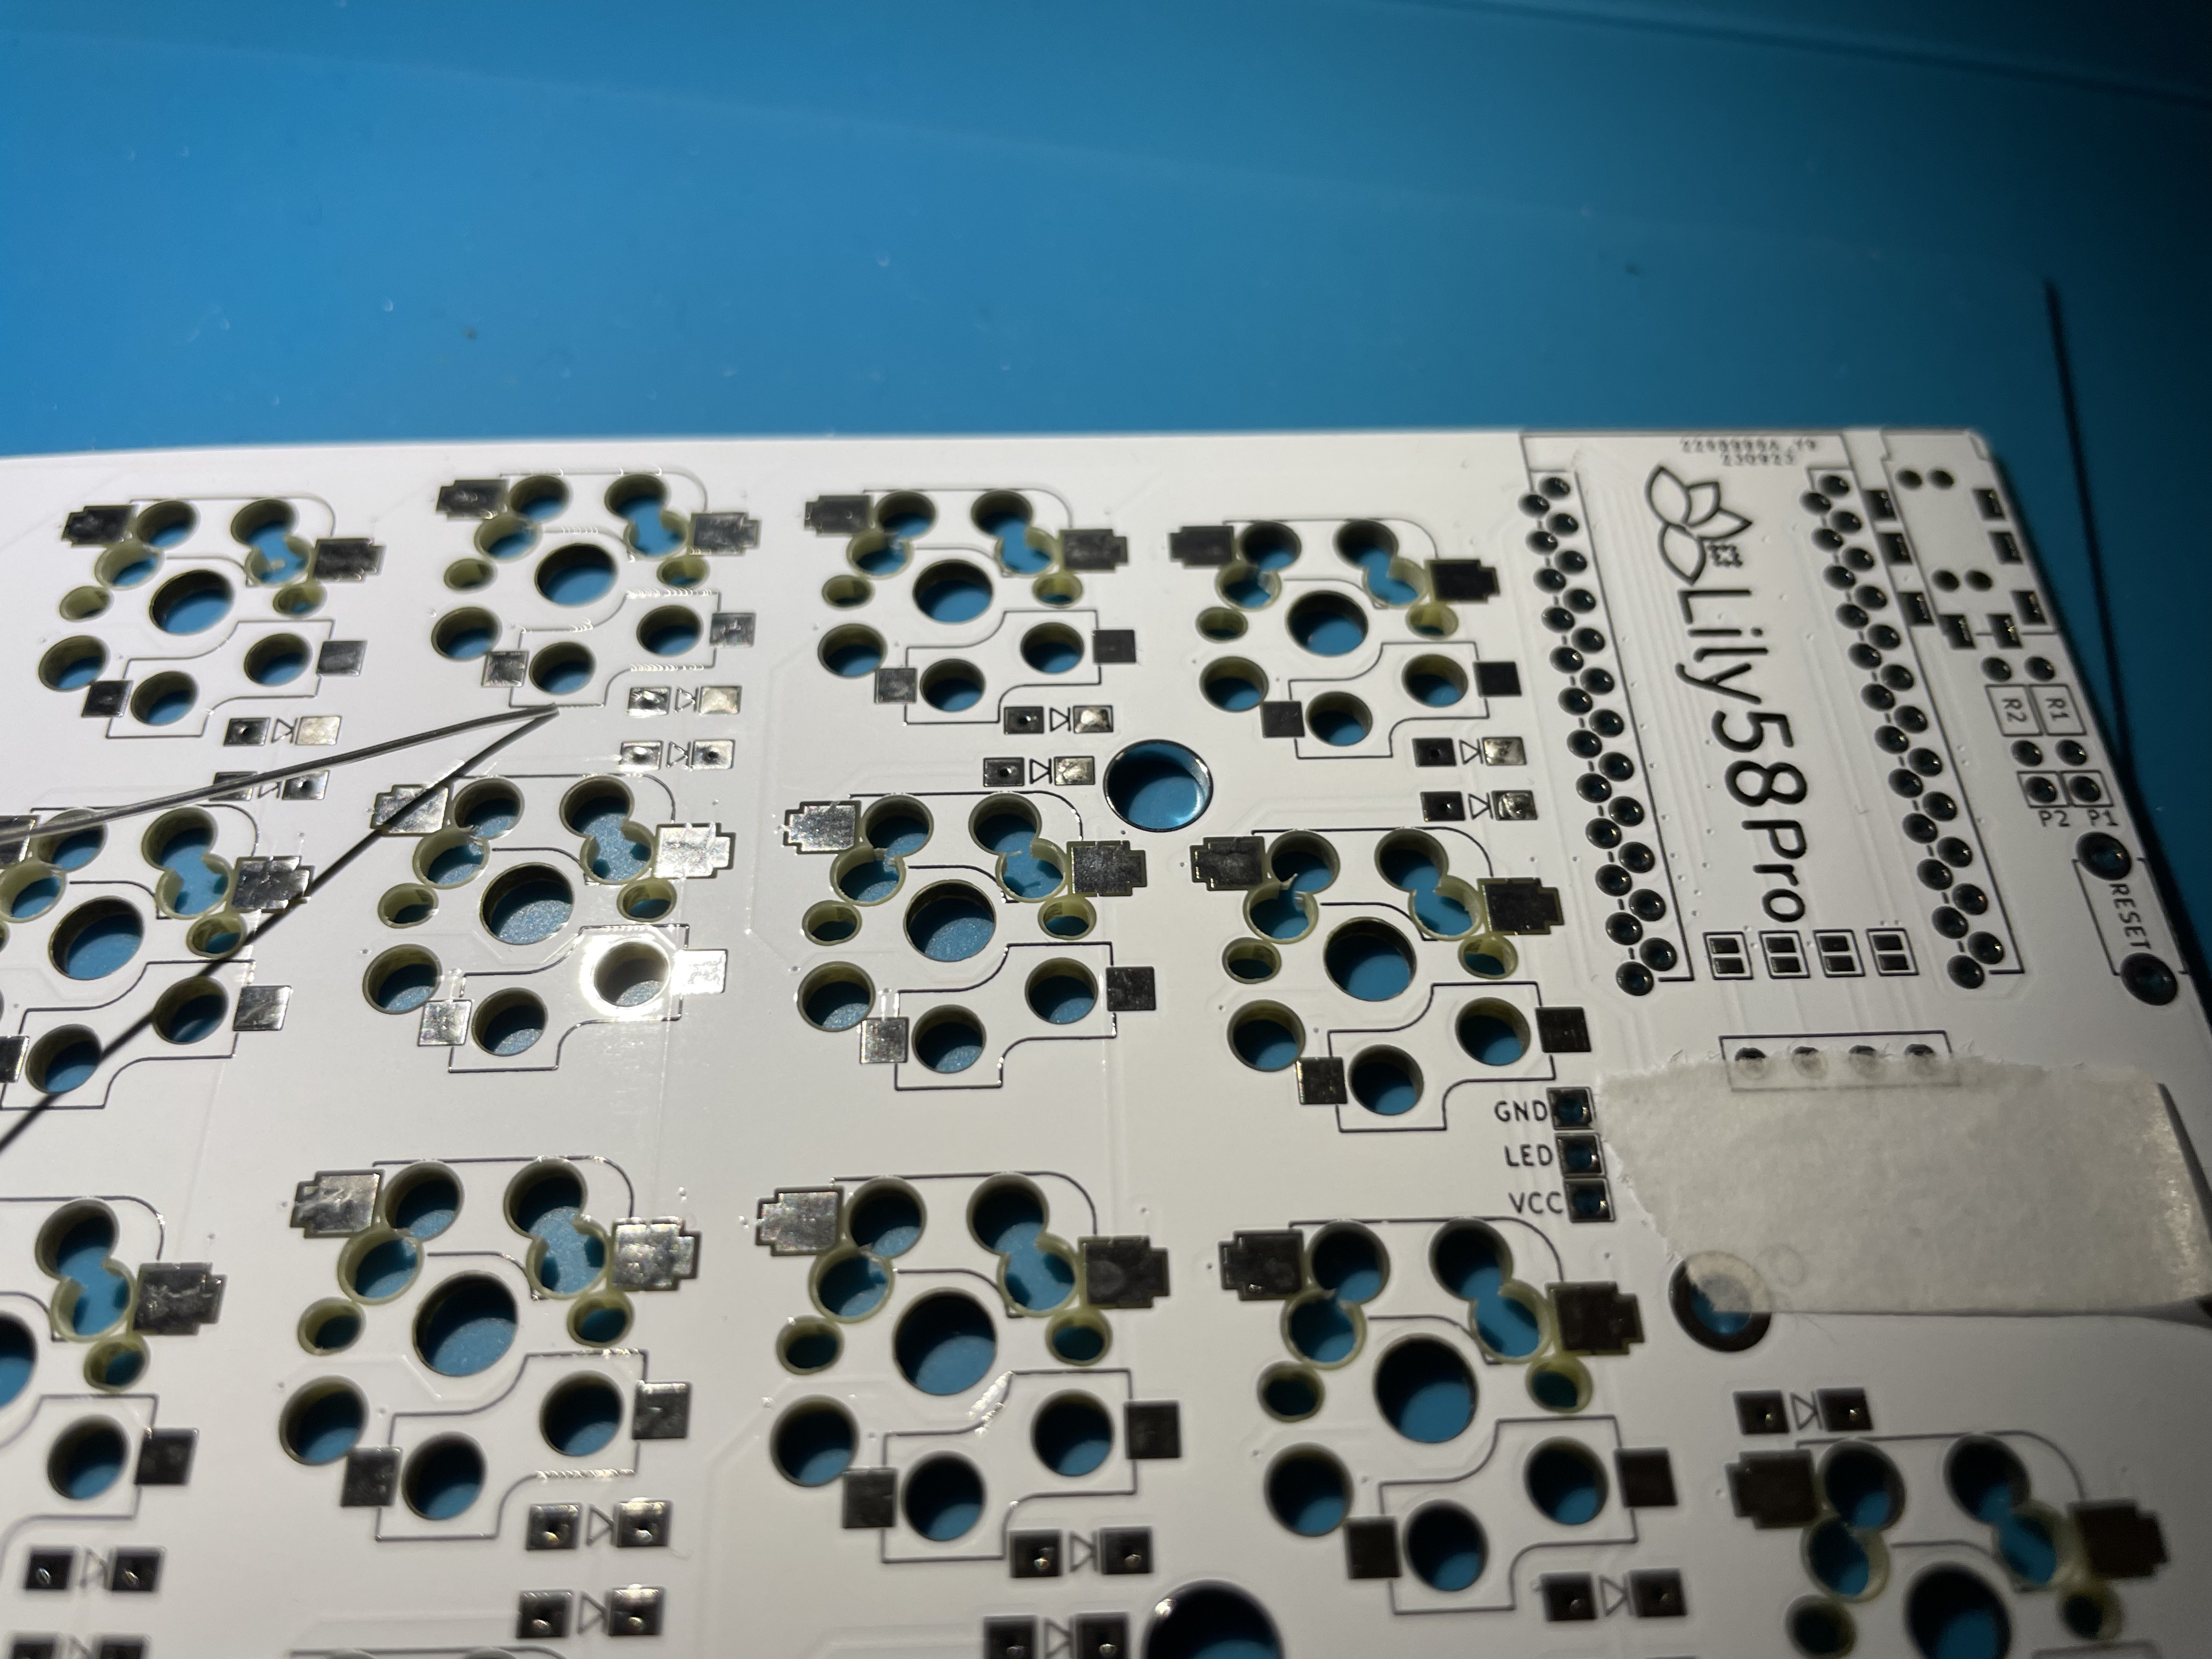
- Sadley I soldered the Machine pins incorrectly, so I I tried removing it without desoldering wire or flux and that was the result.

What a mess


- even though I managed to get all the diods in correctly, I had to get a new board after this as it was proper broken
Lily58 Pro build
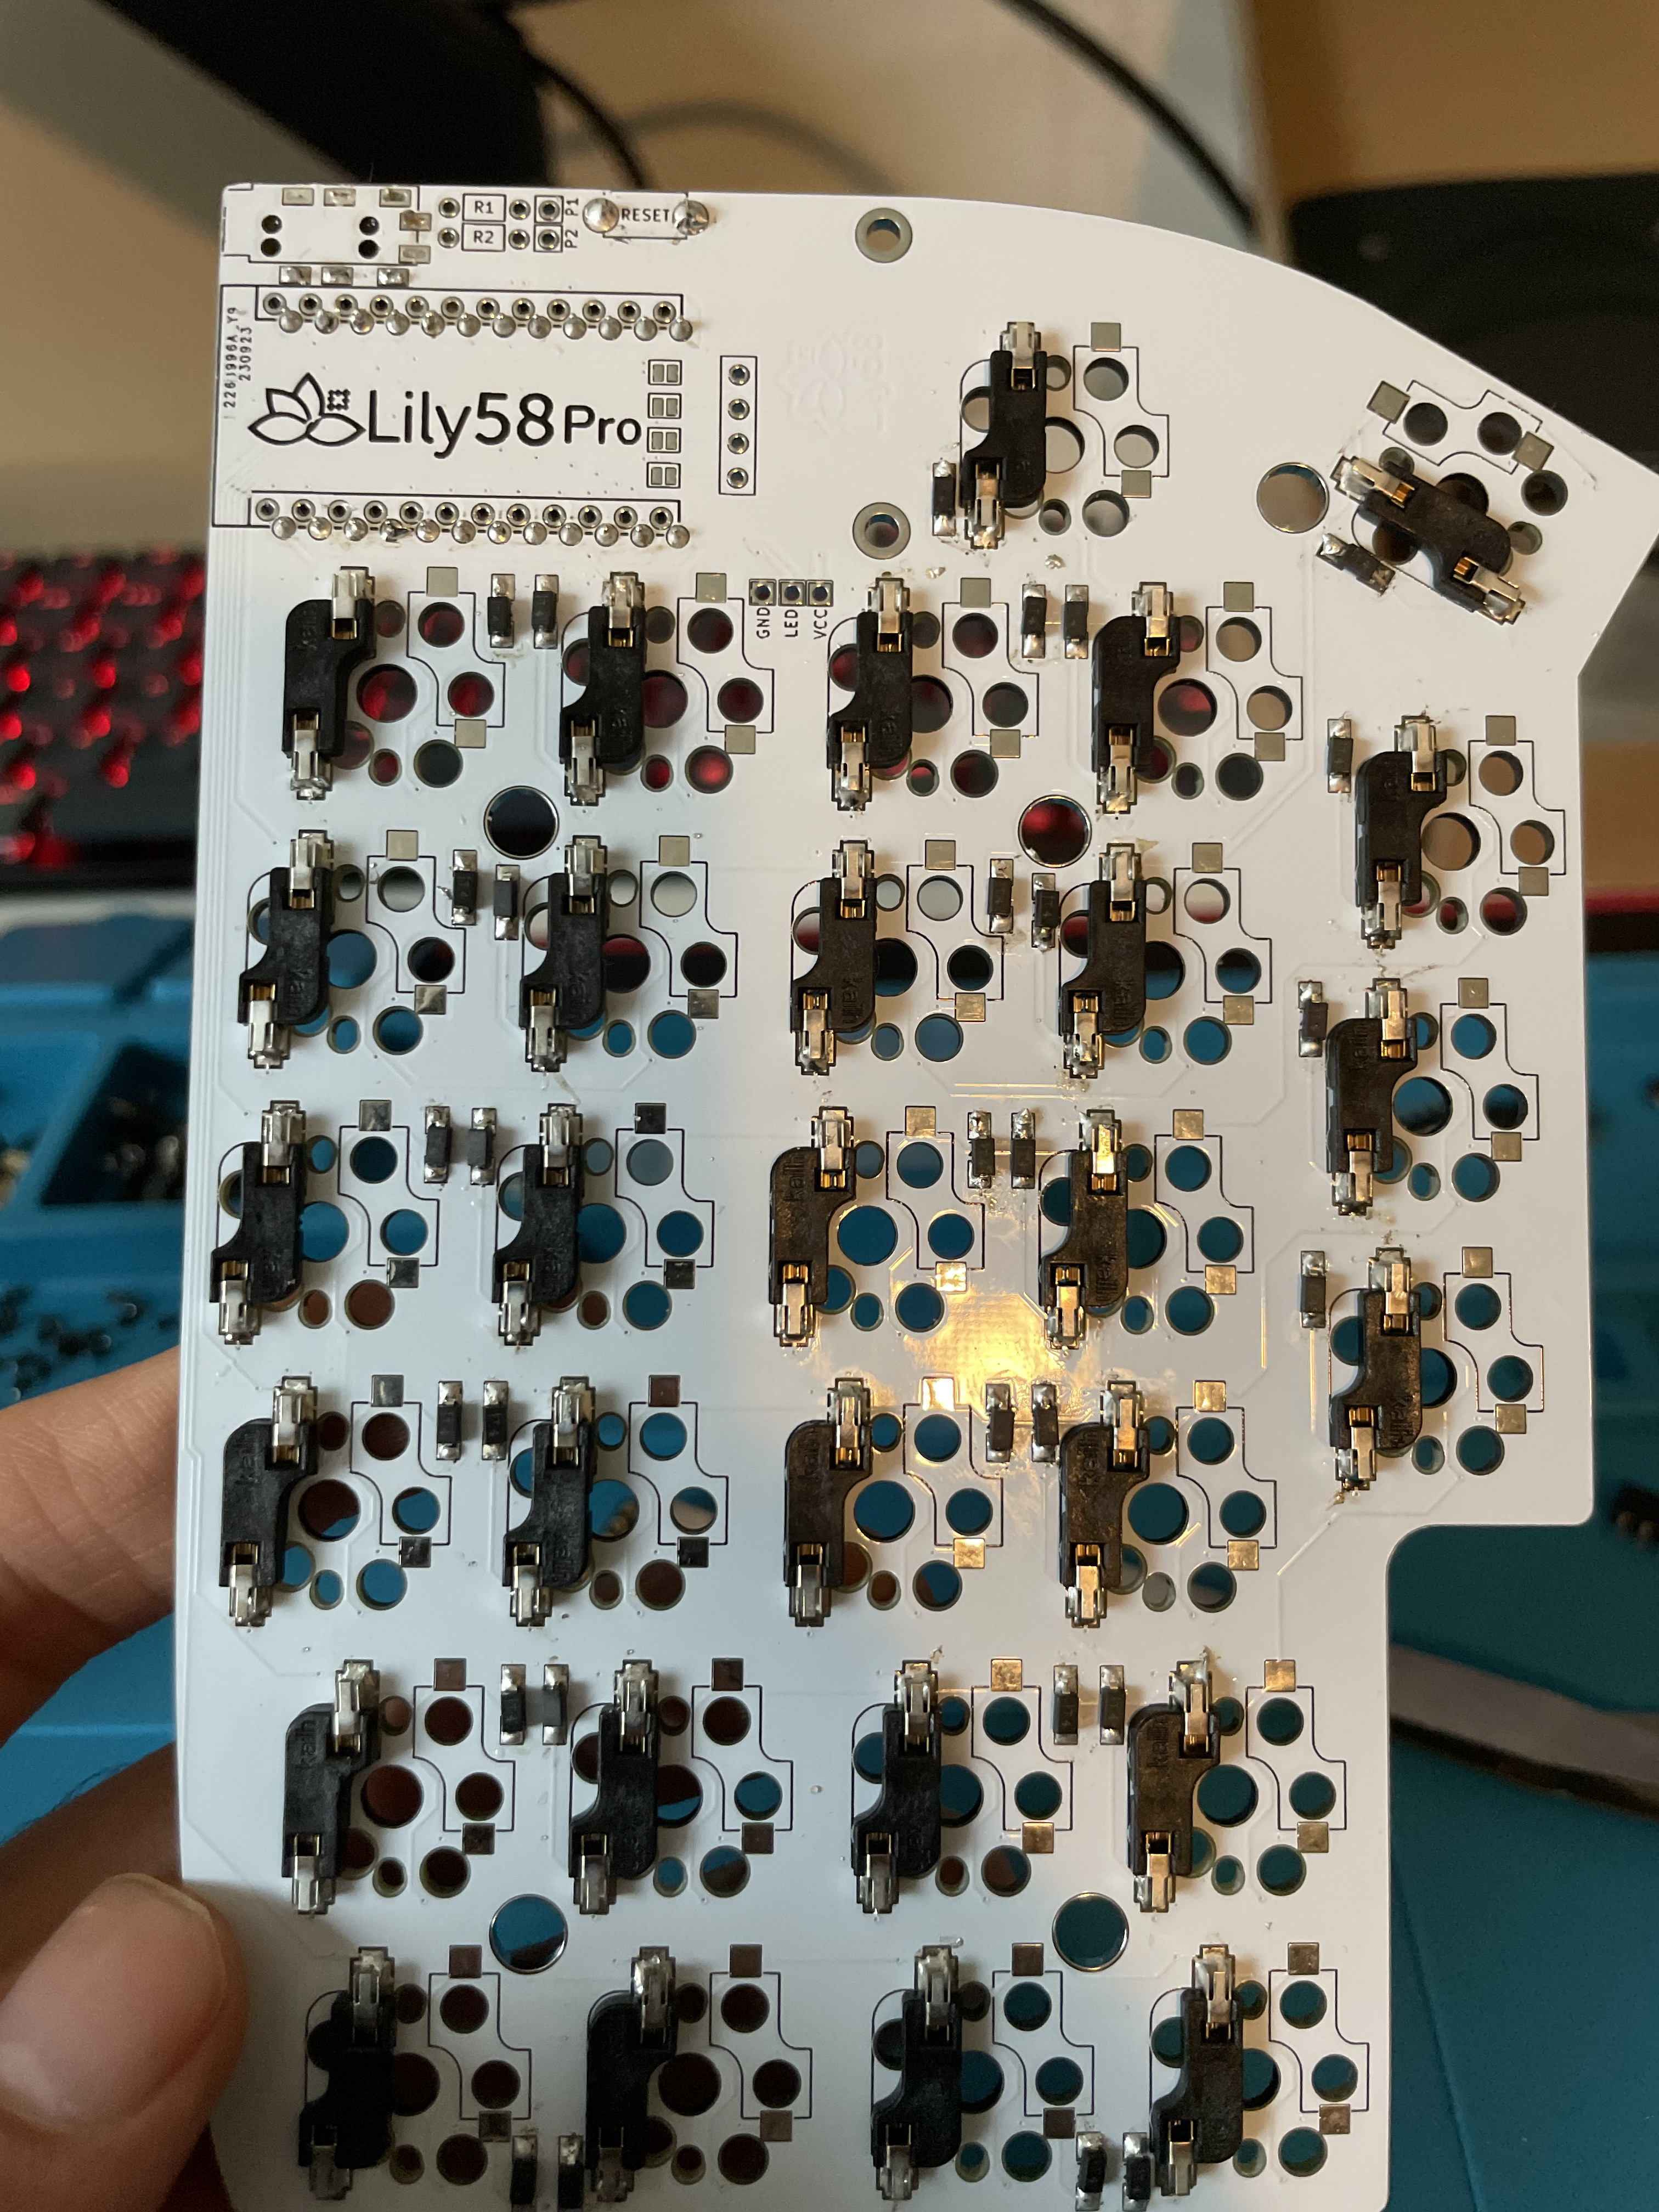
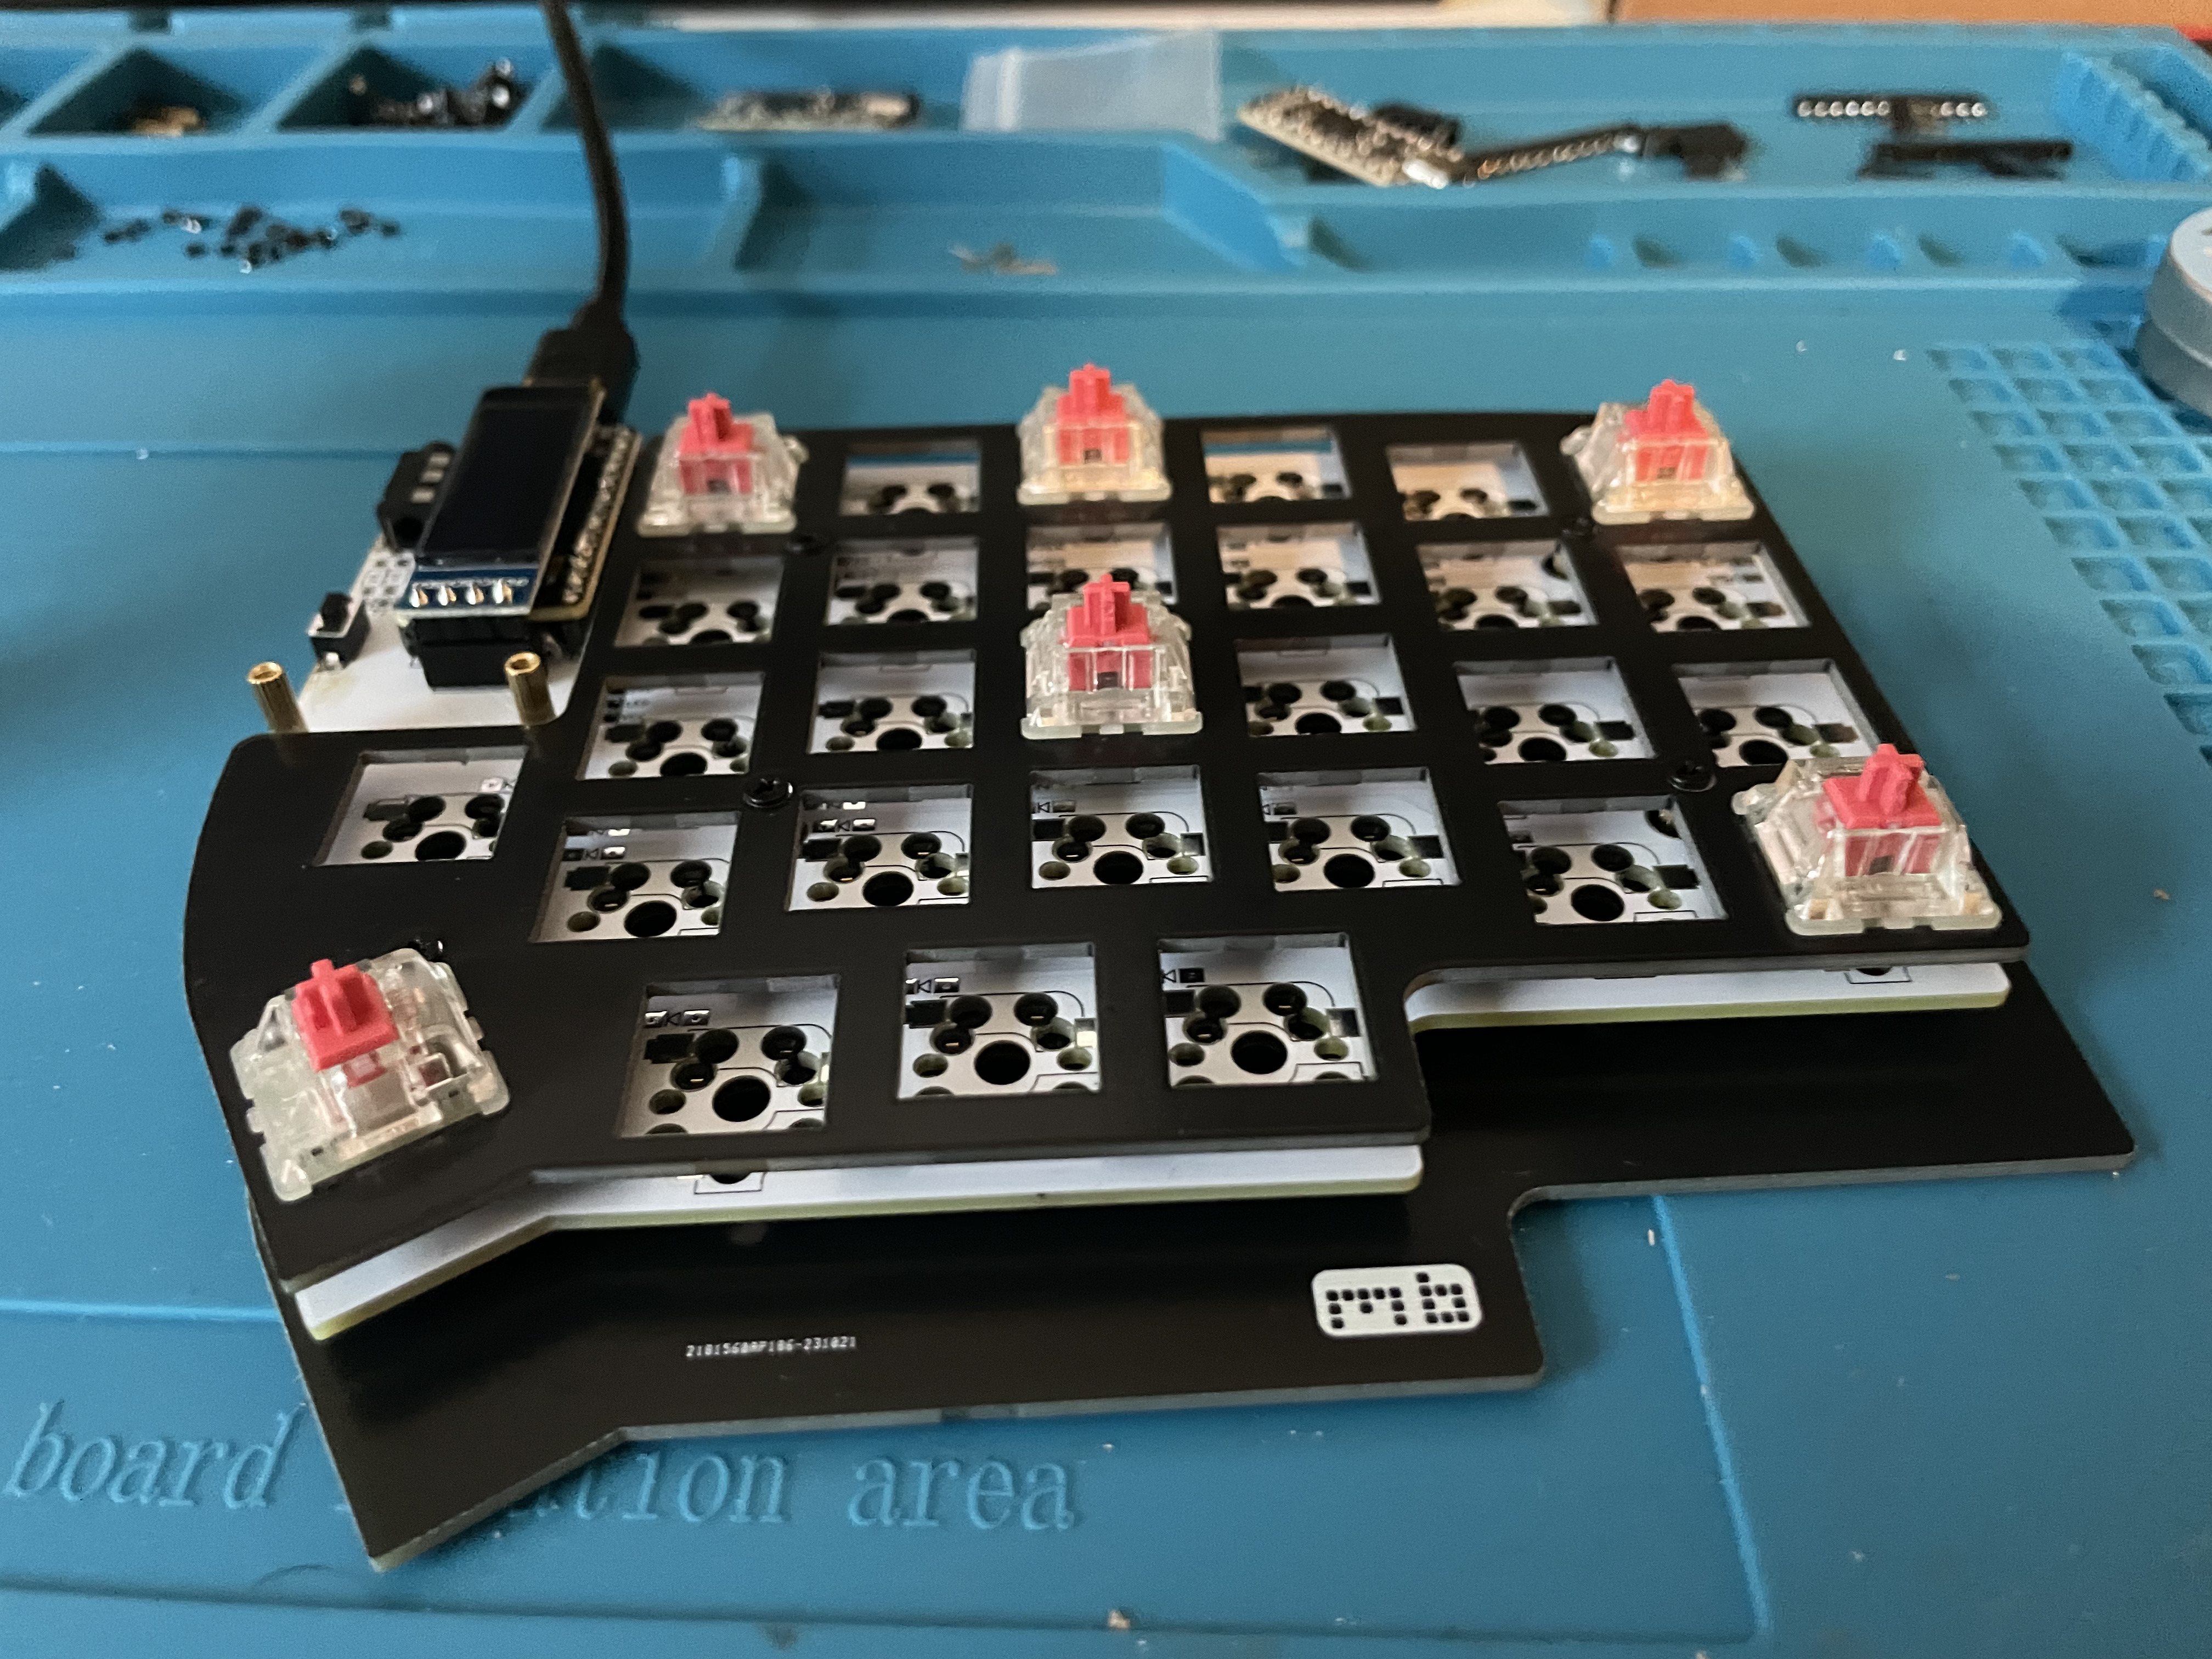
Had to buy new PCB boards. This time I sprung 💸 for the Pro version which gives you hot swapable sockets so you can change out your switches. NICE. I also got wireless controllers the nice!nano V2 Wireless Controller which I should have done in the first place.

- mistakes will happen...
- I soldered the hotswap sockets on wrong

- good thing I had some desoldering wick and flux paste, it all came of smoothly and I could reattach it correctly.


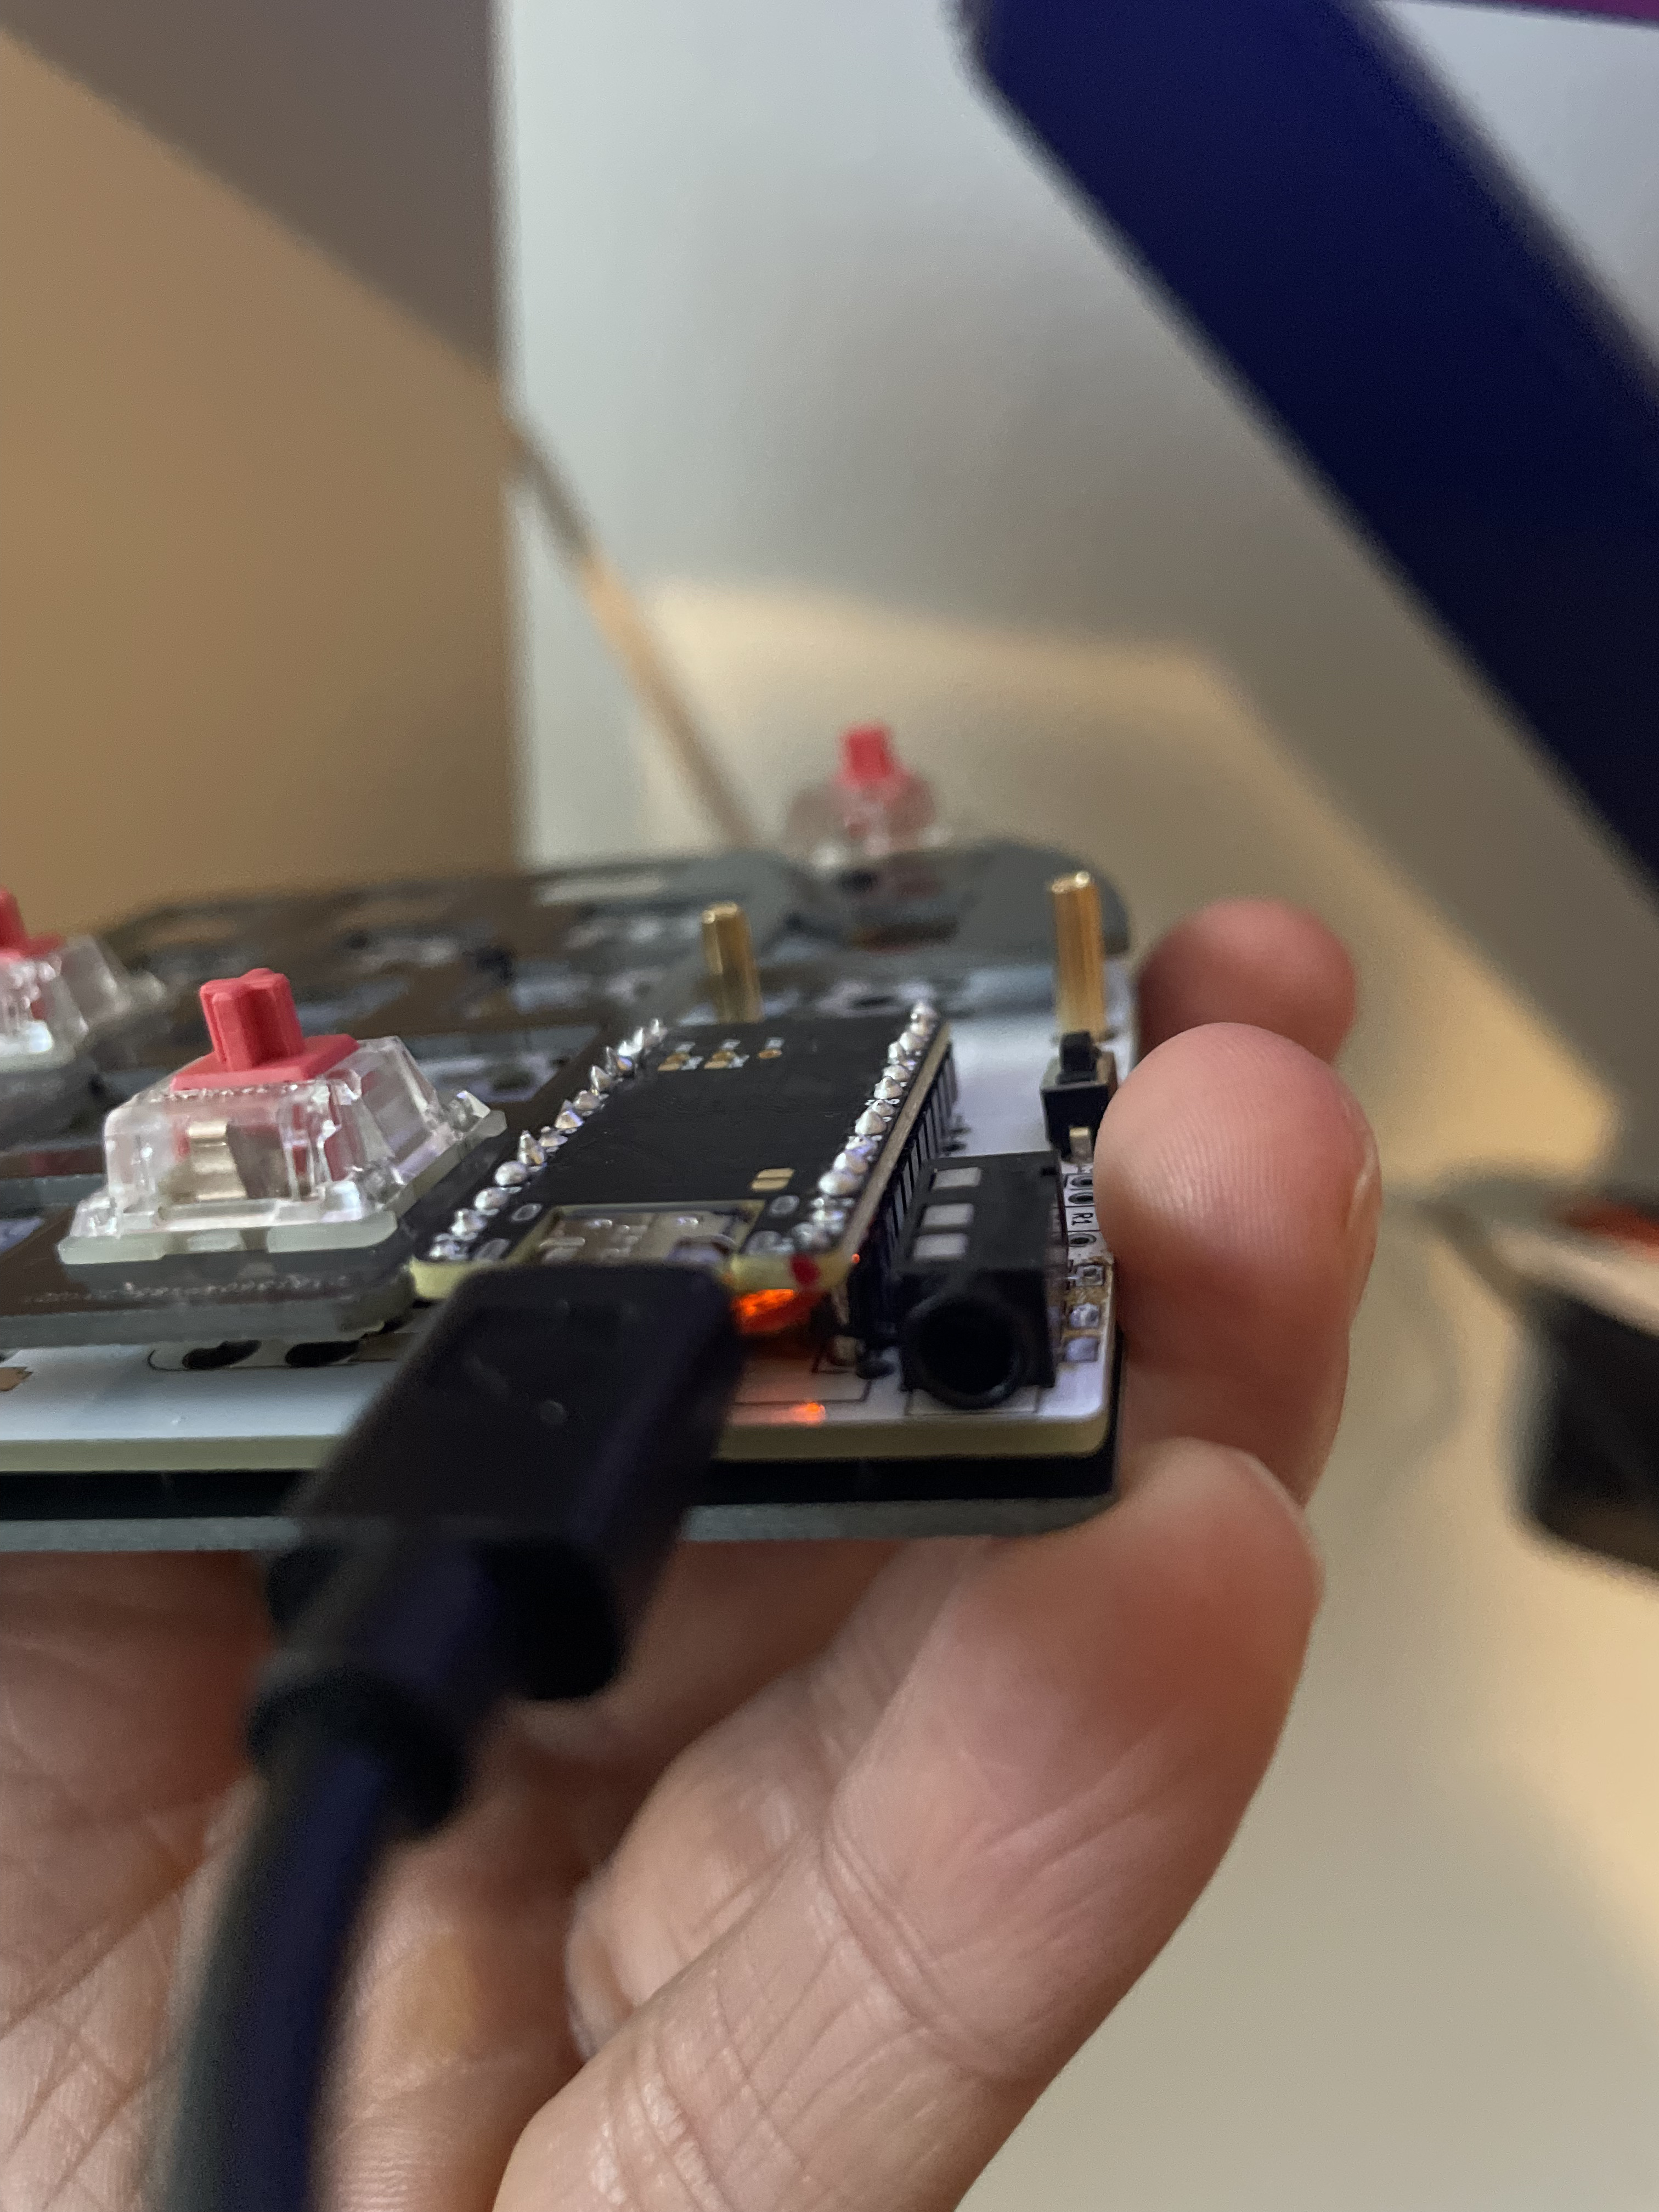
- milli max pins in
- reset button in
- TRRS socket in
sweet victory 😄


Where to buy parts
- kriscables.com in Portugal,
- mechboards.co.uk in the UK.
The YouTubers I watched
- I've tried 4 split keyboards. Which is best
- Is this the perfect custom keyboard
- Sofle Split Mechanical Keyboard
- I split my keyboard in half
- Which keyboard to buy
- I Tried The Glove80 For 100 Hours
- The Dankest ergonomic keyboard